In this example we are going to see how to create a game plugin using c++ and Maratis SDK. Creating game plugin and custom behavior can be seen as complicated in the beginning and require some programming experience, but once the concept is understood and with the help of some starting code like the following one, it will be very soon a powerful ally and a time saving production tool.
1 : Project creation
Start by creating a new project : File > New Project
Lets name it « SimpleGamePlugin » (SimpleGamePlugin.mproj)
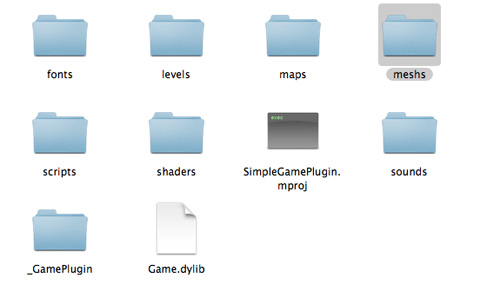
Export or copy your game data (meshes, maps, sounds…) to the project sub-directories. For this example I will just copy a previously created box mesh (box.mesh) in SimpleGamePlugin/meshs/
Add the box in the current scene (« add Entity » button), a light and a camera.
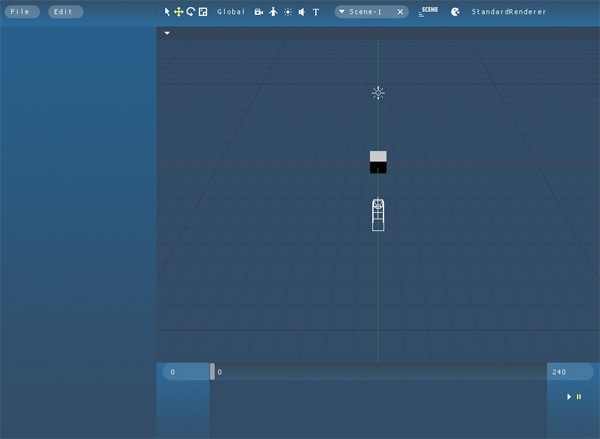
Save your project : File > Save
- The first time it will ask you to create a level file, lets name it « main » (main.level)
Close Maratis.
2 : Game plugin creation
We are now going to create a game plugin containing a custom game class and a custom behavior.
- For this example, the game class will not do anything special, and the behavior will just rotate the object using it.
Lets create a new folder in the project directory, named for example « _GamePlugin ». In this example the folder will contain the source code, a visual cpp project and a xcode project (visual cpp mac equivalent). The goal is to create a dynamic library using Maratis SDK.

In your visual cpp project, your xcode project or your makefile, add :
- additional include :
Maratis/SDK/MCore/Includes
Maratis/SDK/MEngine/Includes
- additional library :
Maratis/SDK/MCore/Libs
Maratis/SDK/MEngine/Libs
- linking :
MCore
MEngine
Lets now create the source code of this example :
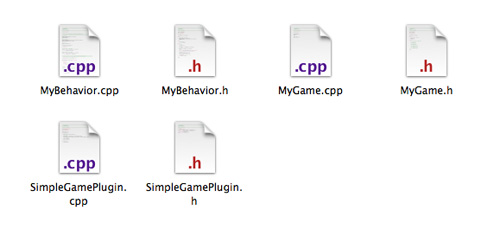
- SimpleGamePlugin.h / SimpleGamePlugin.cpp : plugin init, send custom game and behavior
- MyGame.h / MyGame.cpp : custom game (empty in this case)
- MyBehavior.h / MyBehavior.cpp : custom behavior (custom variable, update function…)
Compile, and be sure the compiled library is named Game.dll (on windows) and Game.dylib (on mac) and placed in the same directory as the project file.
3 : Testing
Run Maratis (manually or from visual studio).
Open the project : File > Open Project > SimpleGamePlugin.mproj
Select the box, and go to the behavior tab (in the left)
« MyBehavior » should be added to the behaviors list.
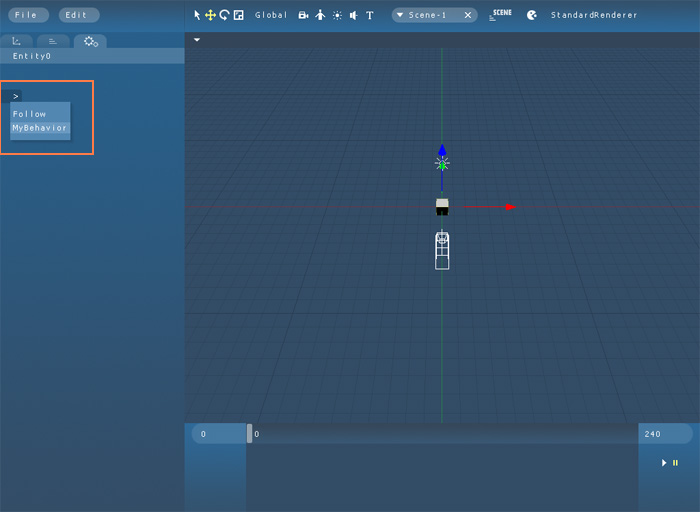
Add the behavior and run the game using the « pacman » button.
The box should turn around the z axis at « rotationSpeed ».
For a more complex use of custom game and behavior, have a look to « WaterGameDemo » giving an example on how to create fishes behavior.


Ping : How to create a Game Interface |
Looks amazing ! GooD work !
Congratulation !
For a more complex use of custom game and behavior, have a look to « WaterGameDemo » giving an example on how to create fishes behavior.
Well , where is » WaterGameDemo » ?
Keep up the good work !
Thanks,
WaterGameDemo is an example released by default into the Maratis package.
After downloading Maratis, unzip it, and look inside the « Examples/ » folder.
This is really good! Now I can make a game.dll with Code::Blocks and MinGW C++, and the artists and level designers can use the actual game code in realtime in MaratisEditor, and it’s the same code as in the final game exe, because I use MaratisPlayer for the final game.