Getting started

Install

- Download Maratis
- Unzip it in the folder you want.

What is inside :
Bin/ Maratis and MaratisPlayer applications
SDK/ Maratis SDK (c++) with includes and libs

Once Maratis is installed, you can associate Maratis project file (.mproj) with Maratis.exe

Editor

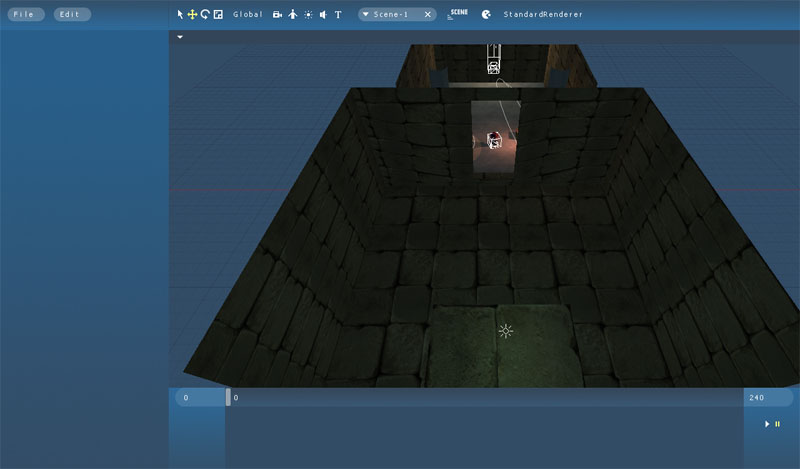
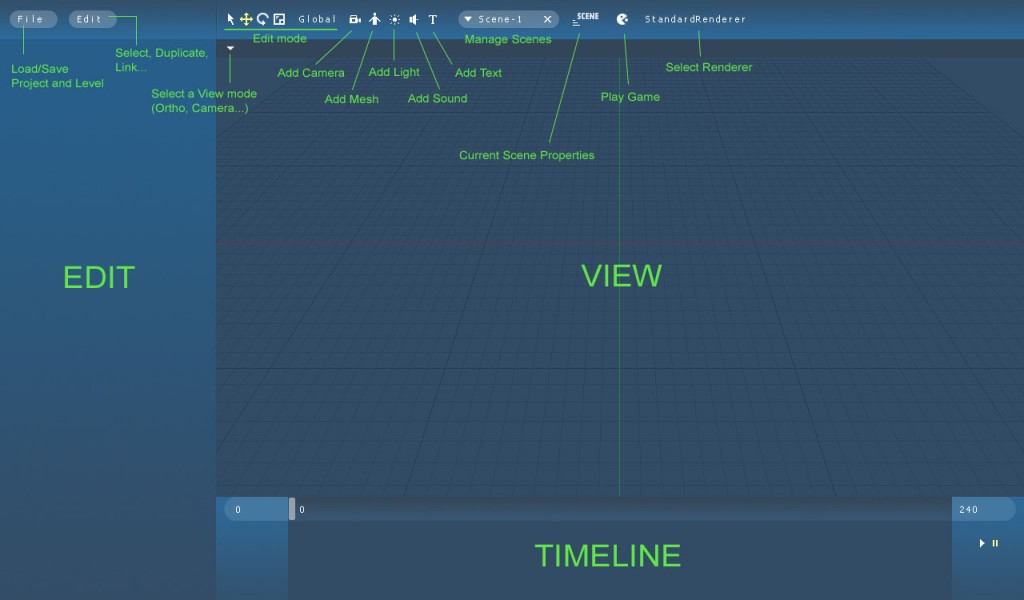
Here’s a general description of Maratis :

How to navigate in the VIEW :

Object selection : Left clic (hold CTRL for multiple selection)
Turn around : Middle mouse button + mouse move
Zoom : Mouse wheel
Pan : CTRL + Middle mouse button + mouse move

You can start by opening an example project:
File > Load project > Examples/Demos/Demos.mproj

This is what the Edit pannel looks like when the camera is selected :
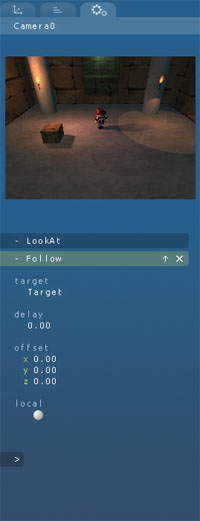
On top are 3 tabs : Transform / Properties / Behaviors

- Transform tab only edit object position, rotation and scale.

- Properties tab edit object properties (depend on object type).

- Behaviors tab allow you to manage object behaviors, in this example, the camera include a « LookAt » behavior and a « Follow » behavior.

Project

A project is always loading a « start » Level, in the previous example it is « Jules.level ».
You can load the other levels of the project by doing File > Load level

How to create a new project :

File > New project
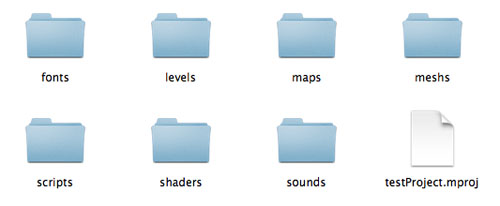
The best way is to create or to select an empty directory, wich will become your project directory. When this is done, Maratis is automatically creating the project file (.mproj) and the main data directories :

This is where you should copy your production files (you can create sub folders).
Textures in maps/
Meshs in meshs/
etc

What to look next : Export models from Blender

Voila !
I let you have a look on the different examples,
for questions please use the forum
enjoy.

Publié dans Docs | 5 commentaires

Blender export


Install

- Download maratisExporter (for Blender 2.5+ or Blender 2.6+) : DON’T UNZIP FILE
- Start Blender and go to File > User Preferences > Add-Ons > Install Add-On
- Select
maratisExporter.zip and check Import-Export: Maratis mesh
- Save As Default

_
Maratis mode

Select Maratis in the Blender Render menu, it will enable special panels for Maratis.

_
Maratis Materials

[IMPORTANT : only the green boxed in areas are supported]


Maratis materials are a bit different than Blender materials, only some features are supported (see the green boxes) and they are real-time oriented.

An additional panel is visible in the Material properties :

You can choose between 3 modes for Maratis materials :

Fixed
is used for old generation 3d using multi-texture only (mostly deprecated today).
Standard is the simplest mode, it creates a classic material using diffuse, specular, normal-map and emit.
CustomShader
is the mode to select if you want the material to use a specific glsl shader, shader samples here.

The Blend-mode specify what type of transparency is applied to the material.

_
_

- Texture slots :

If you are using a Standard material, the texture slots needs to be used in this order :

The only Type supported is Image or Movie
(though movies are not supported yet)

_
_
_
_
_

If you are using a Fixed or CustomShader material, you can use up to 8 texture slots :

In glsl, texture slots are accessed using :
uniform sampler2D Texture[8];

_
_
_
_
_
_
_
_

- Supported Image sampling :

_
- Supported Image mapping :

_
- Supported Mapping :

_
- Supported Influences

(only active in Fixed mode for multi-texturing blending)

_
Skinning


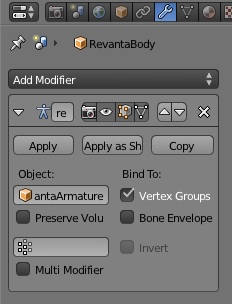
Maratis only supports Vertex Groups skinning :
be sure to turn off the Bone Envelope option.

If you don’t want to do the skinning manually :
- select your model, then select the armature
_(both need to be selected)
- go to Object > Parent > with Automatic Weights
> select ‘With automatic Weights’

_
Animation and multi-animation

_
Export

Select the objects you want to export and go to File > Export > Maratis mesh
(Don’t forget to select the Armature(s) with the Object(s))

_
Things to keep in mind

In general :

- Be sure your textures are in Your-Maratis-Project/maps/
- Export the meshs to Your-Maratis-Project/meshs/
- 10 units is equal to 1 meter
- Use 60 fps frame rate in Blender for animation

For large objects :

When working on large objects, like a full level with multiple rooms, try to separate the mesh in multiple Blender objects (for example, one for each room). When exported in Maratis mesh format, each object will become a SubMesh.

Why ?
- For a better visibility detection (only visible SubMesh will be draw)
- For more dynamic lights. Maratis standard renderer only uses the 4 closest lights of each SubMesh.

Publié dans Docs | Commentaires fermés